Omlet Docs
BlogChangelogAsk the CommunityContact Sales
  • Get started
    • What is Omlet?
    • CLI & Dashboard
  • Omlet for VS Code
  • CLI & Dashboard
    • CLI
      • Your first scan
      • Set up your dashbard
      • Future scans
      • Ensure data accuracy
      • Config file
        • Exports configuration
        • Mapping aliases
        • Excluding certain components & files
        • Tutorial: Config file
      • Custom component properties
        • CLI hooks
        • Tutorial 1: Team/code owner usage
        • Tutorial 2: Package version tracking
        • Other example scripts
      • Set up regular scans
      • CLI commands
        • init
        • analyze
        • login
    • Analytics
      • Popular charts
      • Create custom charts
      • Save charts to dashboard
      • Share charts and dashboards with your team
      • Download chart data
    • Components
      • Search and filter components
      • Component tags
      • Dependency Tree
      • Props tracking
    • Workspace & Account
      • Invite team members
      • Renaming projects
      • Update your email address
      • Access your billing details & invoices
  • Security
    • Security in Omlet
    • Data collection
  • Help
    • Pricing
    • FAQs
      • How detection works?
      • Monorepo support
      • How to delete scans?
      • Omlet vs. React Scanner
      • Working with multiple workspaces
    • Troubleshooting
      • Debugging CLI issues
      • Some components aren't detected
      • API failed or timeout
      • Are you behind a proxy?
      • Troubleshooting Git errors
Powered by GitBook
On this page
  • Quick demo
  • Installation
  • Get started
  • No React components found?
  • Having performance issues?
  • Need more data?
  • What's next?

Omlet for VS Code

Guide to help you get started with Omlet's VS Code extension.

PreviousCLI & DashboardNextCLI

Last updated 1 month ago

Omlet for VS Code provides real-time insights into your React components directly within your editor—allowing you to monitor component usage, analyze prop values, visualize dependencies, and identify unused elements.

Quick demo

Installation

Once the extension is installed, you can open a React project to get started. The extension will automatically run when it detects any .js, .ts, .jsx, or .tsx files.

Get started

1

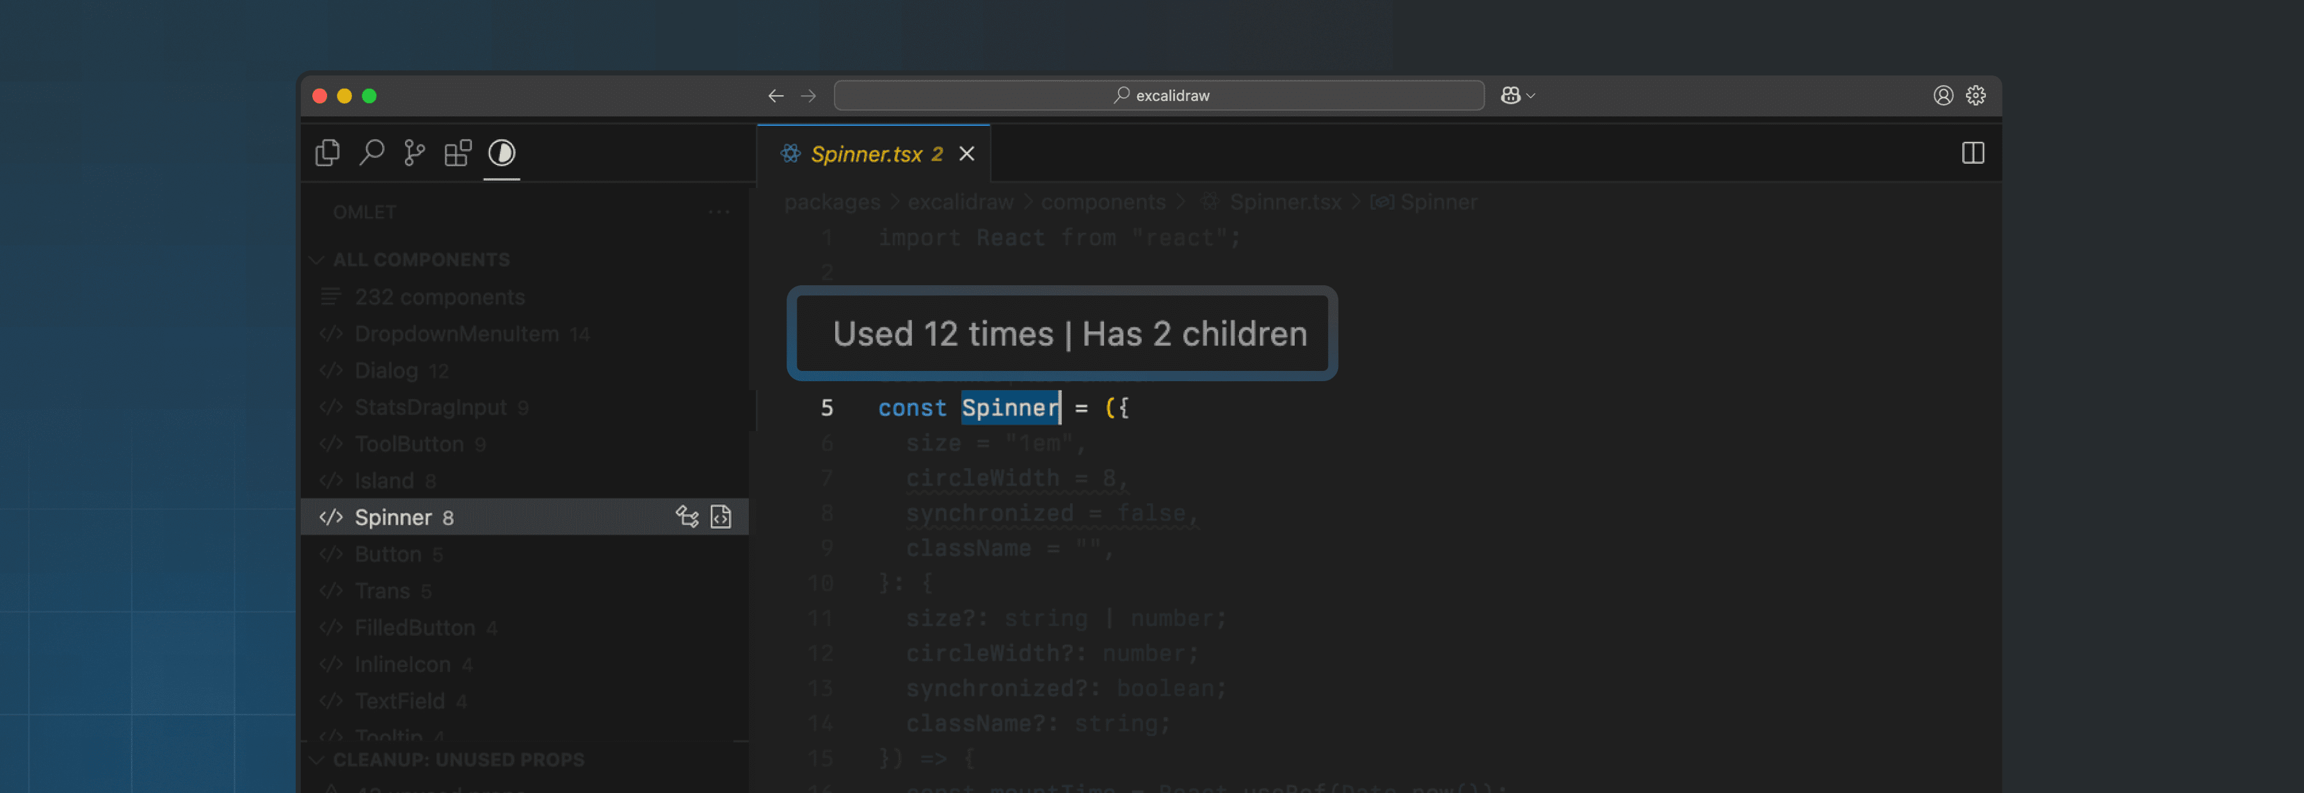
See how many times a component is used directly in code

Omlet for VS Code displays how many times a component is used, directly above its definition. No need to search through your codebase — just glance at the usage count in your editor.

2

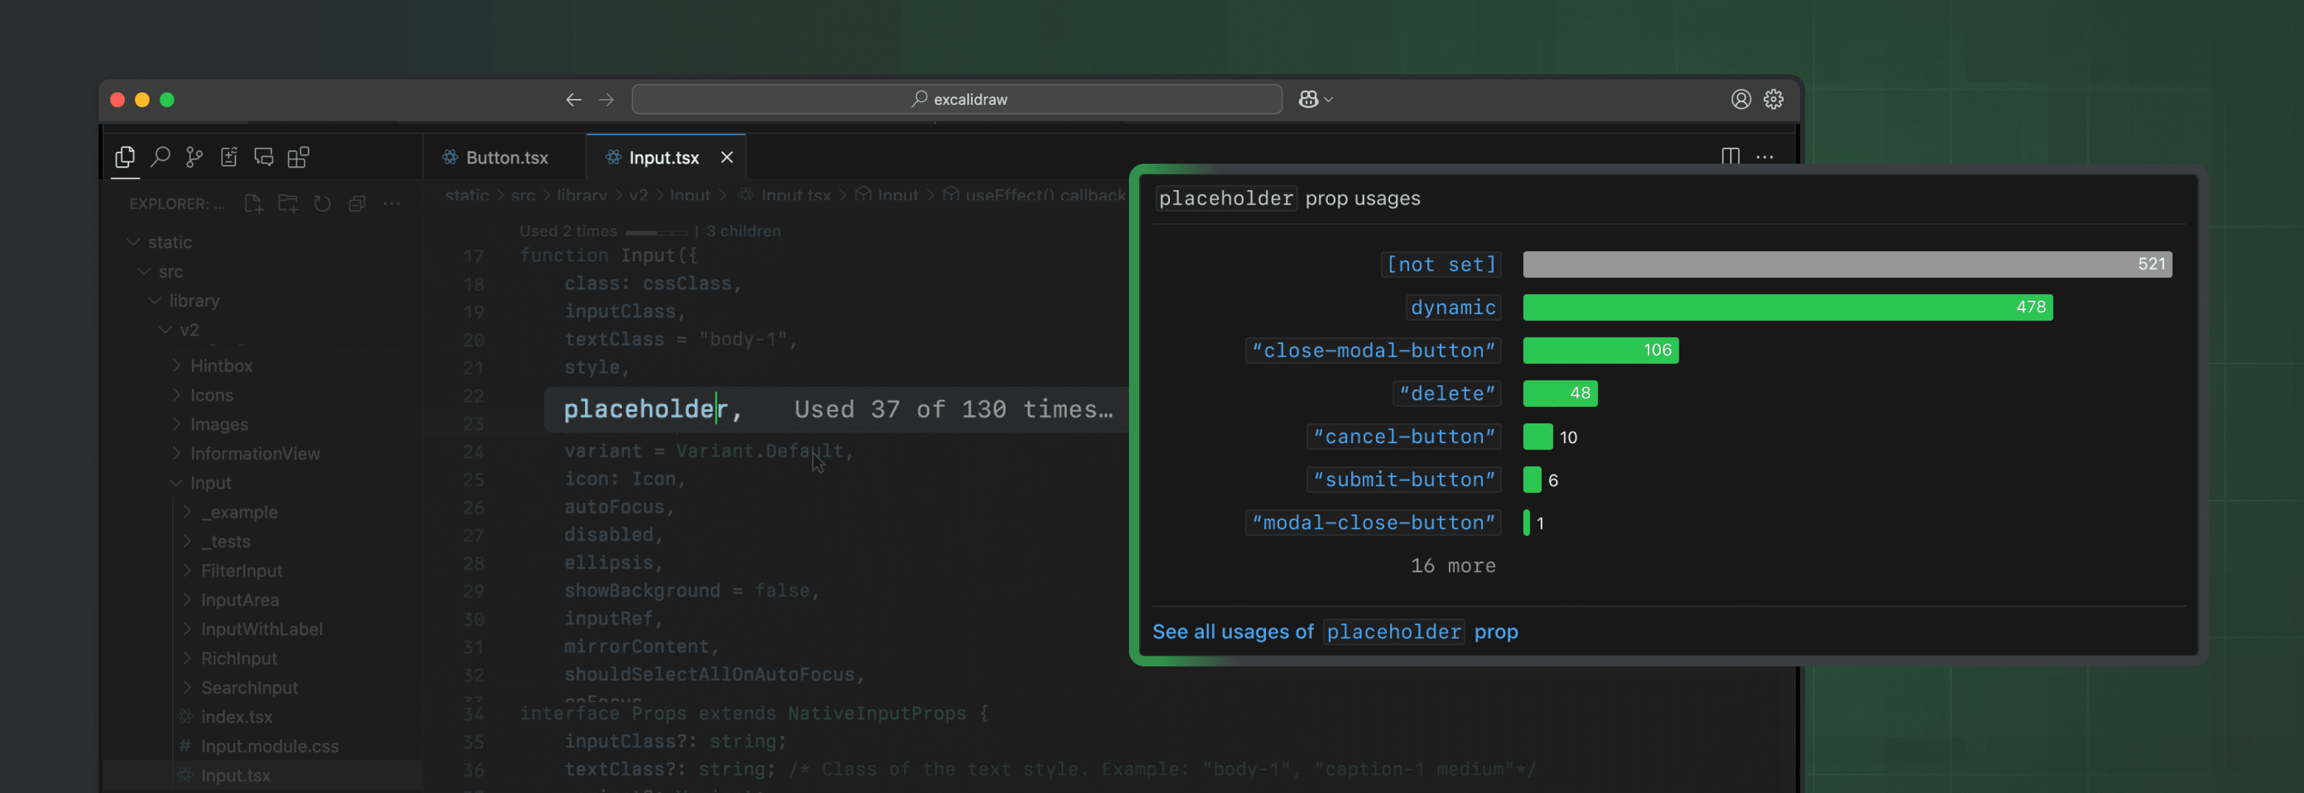
Discover how many times each prop is used — and with which values

Select a line where a prop is defined to see how many times it’s used across the codebase. Hover over it to get a quick breakdown of the values passed.

Click on a prop value to see exactly where the component is used with that specific prop-value combo.

3

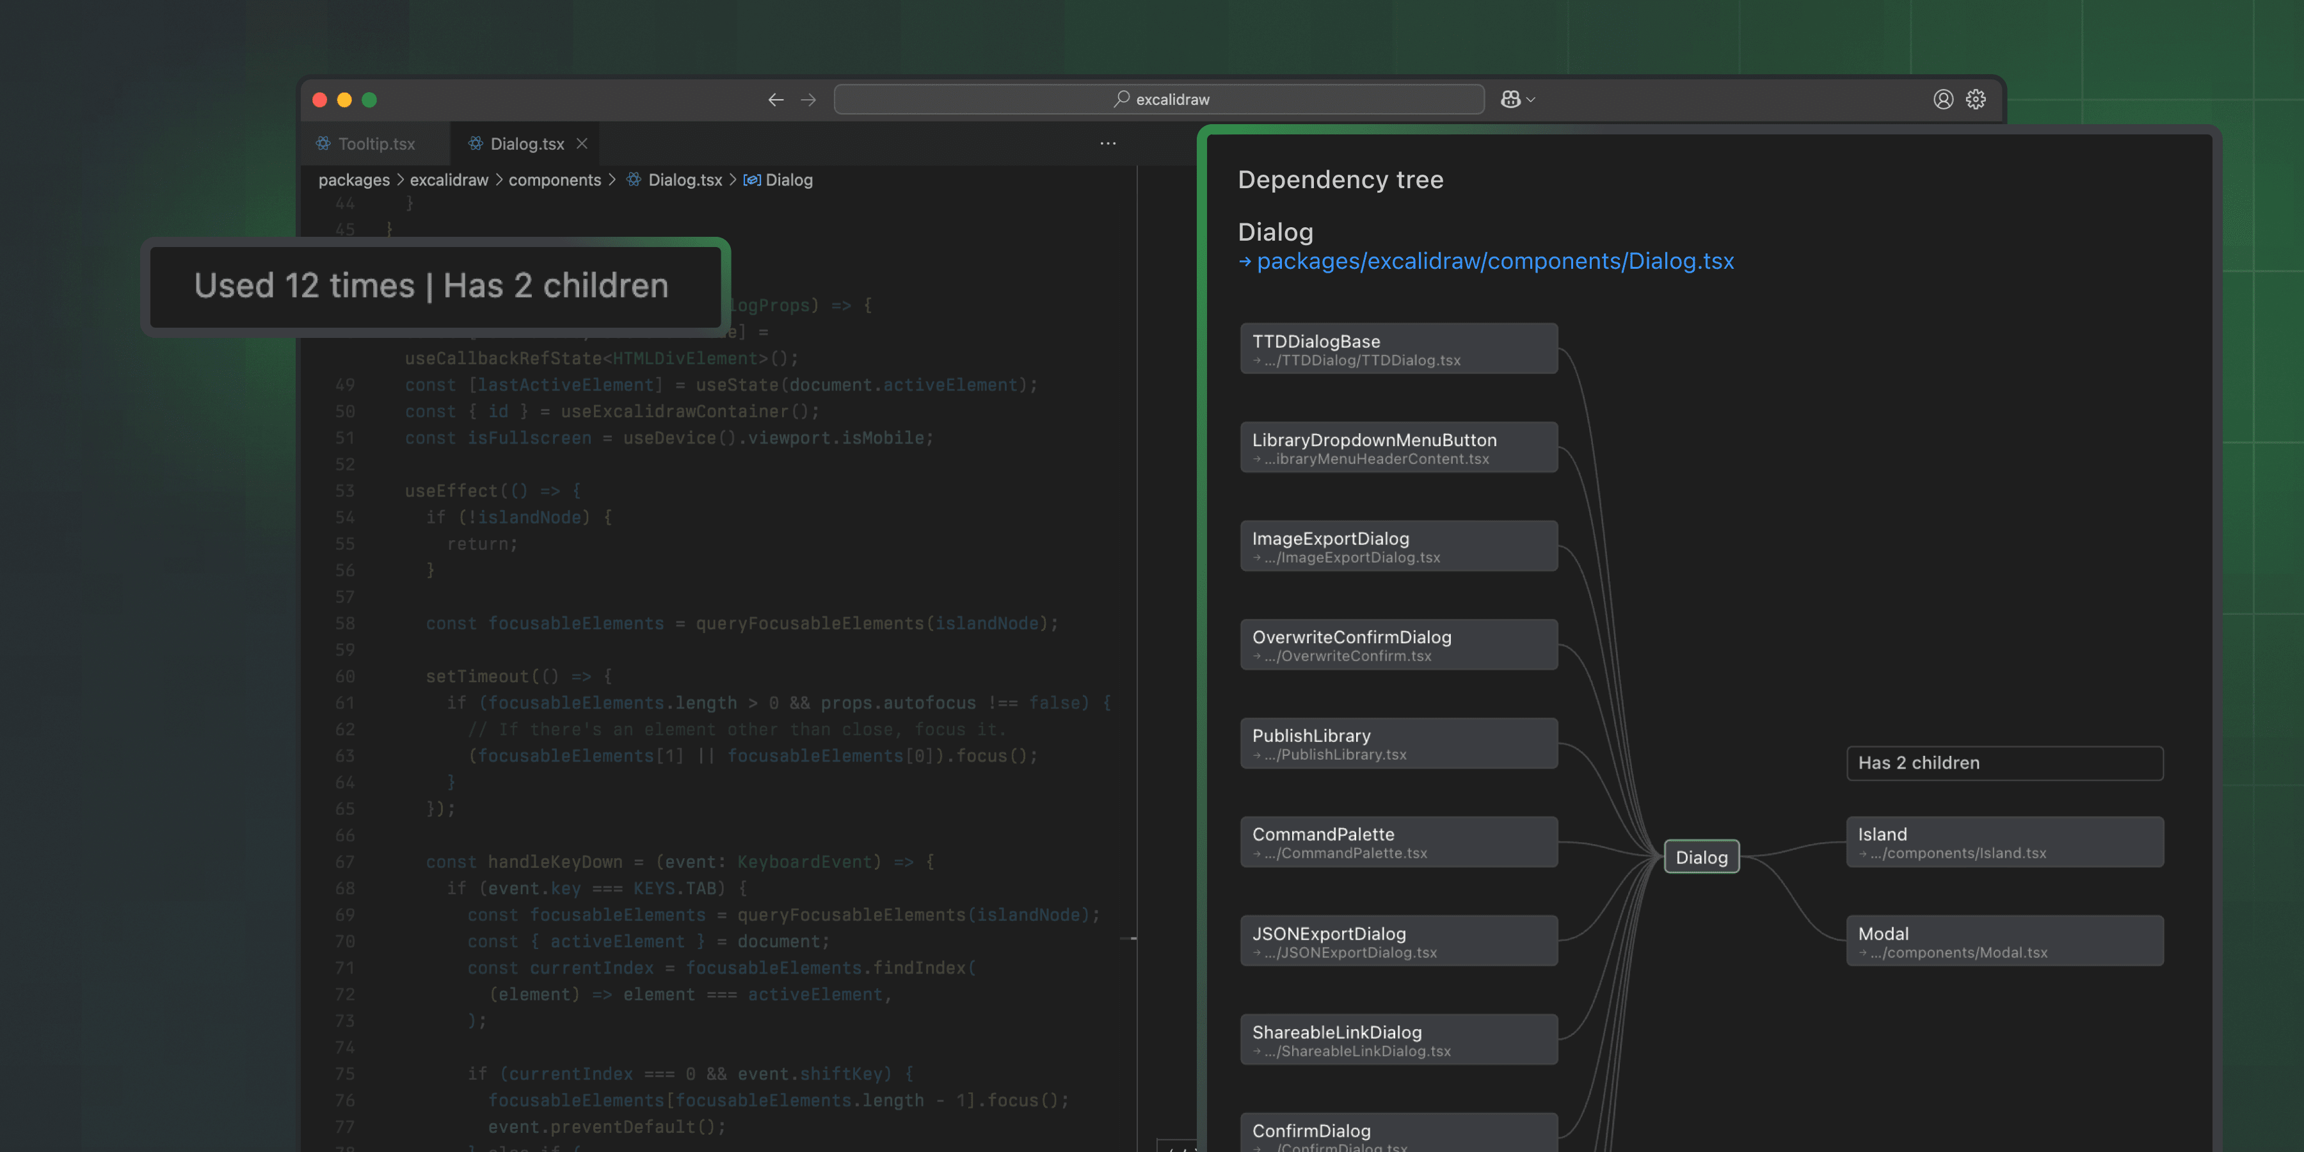
Visualize where components are used with the dependency tree

See where components are used in a interactive map. Refine components and props confidently — minimizing bugs and predicting the impact of updates.

4

View all components in your project and their usage details

The extension lists all your components in the sidebar, showing their usage counts at a glance. If you need to dive deeper, you can click a component to view its dependency tree.

5

Clean up unused props and components

Right below the component list in the sidebar, you’ll find two cleanup sections: One for unused props and one for unused components. Those will help you clean up your library and keep components simpler.

No React components found?

Omlet currently supports React and React Native components. If the extension isn’t detecting components in your React project, ensure your project has a .git file as Omlet relies on Git history to track components.

If your project doesn’t have a .git file, you can initialize Git using the below command sequence. This will set things up locally without requiring you to publish the project to a remote repository.

git init 
git add . 
git commit -m "Initial commit"

Having performance issues?

If you’re working in a large project—such as a monorepo or a codebase with many microservices—scans may take longer than expected.

To improve performance, you can narrow the scan scope using the rootPath setting to specify where the scan should start, and the ignoredPaths setting to exclude folders you don’t need to be scanned. These options can help reduce scan time significantly by focusing only on directories with React components instead of scanning the entire workspace.

To update these settings in VS Code:

  1. Open the Command Palette (Cmd/Ctrl + Shift + P) and type “Preferences: Open Settings (UI)”.

  2. In the top search bar, type “Omlet”.

  3. Scroll to the Extension: Omlet section.

  4. Adjust the Root Path and Ignored Paths fields as needed.

Need more data?

What's next?

You can install the extension from VS Code marketplace: 🔗

Any issues or feedback? Reach us at , or ping us on .

Component usage counts
Prop usage counts
Prop usage counts

If the issue persist after setting up .git, ping us at .

If you’re still running into issues, we’d love to hear more about your setup. Feel free to ping us at with details such as how many components you’re working with or a screen recording.

The extension analyze the usage only within the repo opened with VS Code. For advanced scanning capabilities beyond the extension, you can use Omlet CLI to scan multiple repositories and set up your Web dashboard. .

We plan to provide more insights in the editor, integrate it further with Omlet’s Dashboard, and introduce linter-like capabilities. Feel free to tell us more about your experience with the extension and share any feedback at .

Install Omlet for VS Code
support@omlet.dev
Discord
support@omlet.dev
support@omlet.dev
Get started with a tutorial
hi@omlet.dev